


How to Enable Maintenance Mode in WPHost #
Maintenance Mode lets you temporarily hide your website’s content from visitors and show them a custom screen while you carry out technical work. You can customize the screen text, background image, countdown timer, and social media links.
Open the website settings
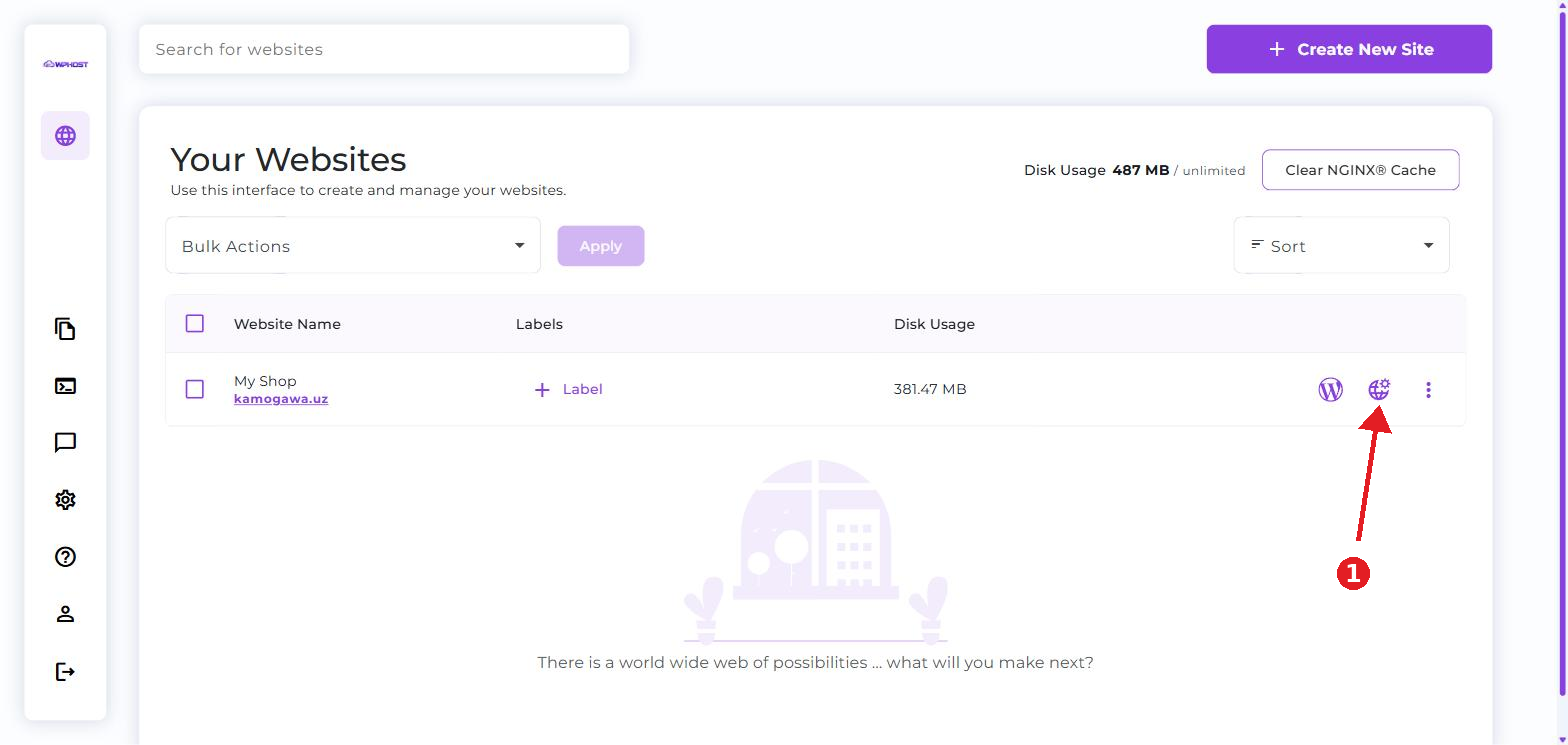
In the WPHost panel, go to the Your Websites section.
Find the site you need in the list and click the website settings icon on the right side of its row.
Open the Maintenance Mode section
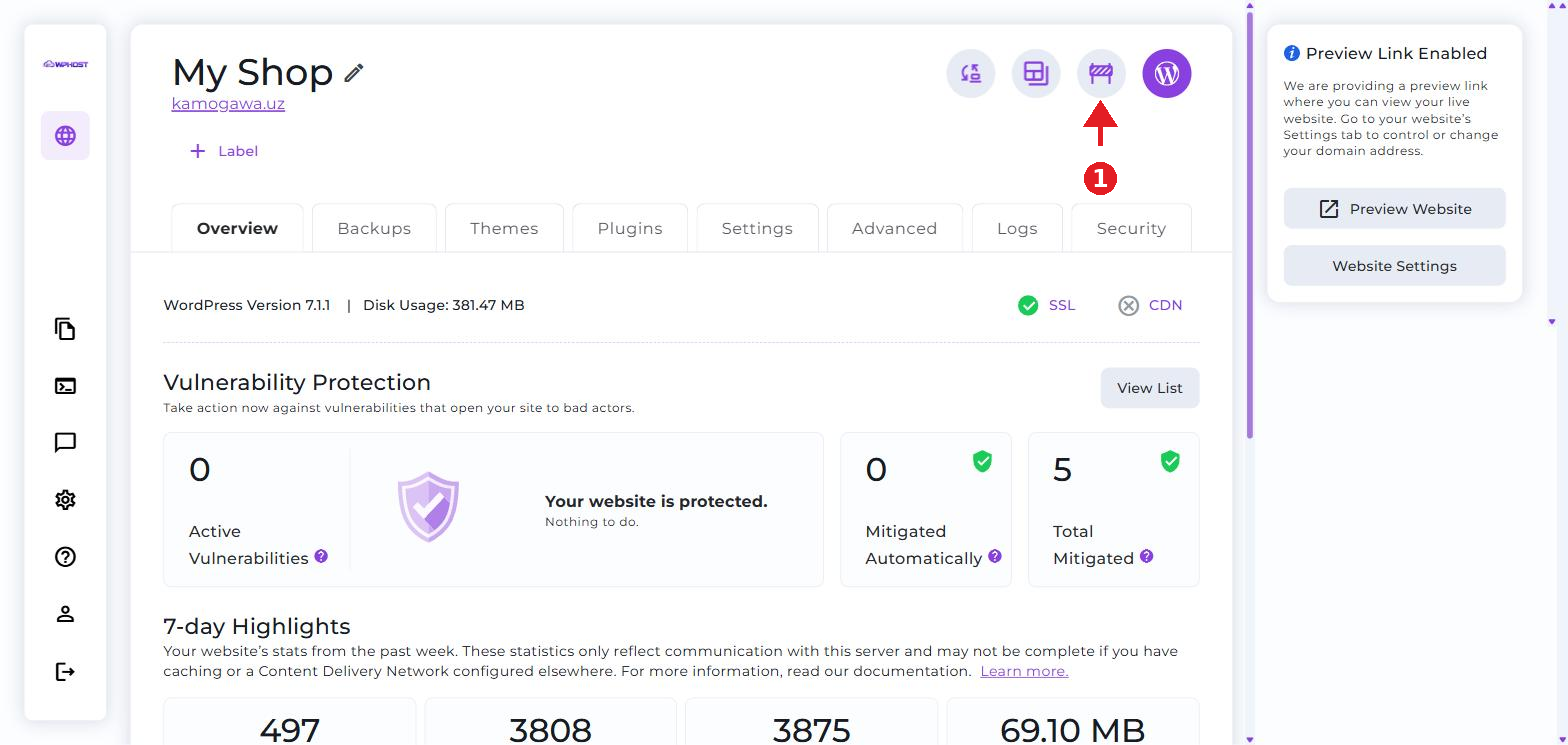
At the top right of the website page, click the Maintenance Mode icon (the road-barrier icon).
Customize the screen text
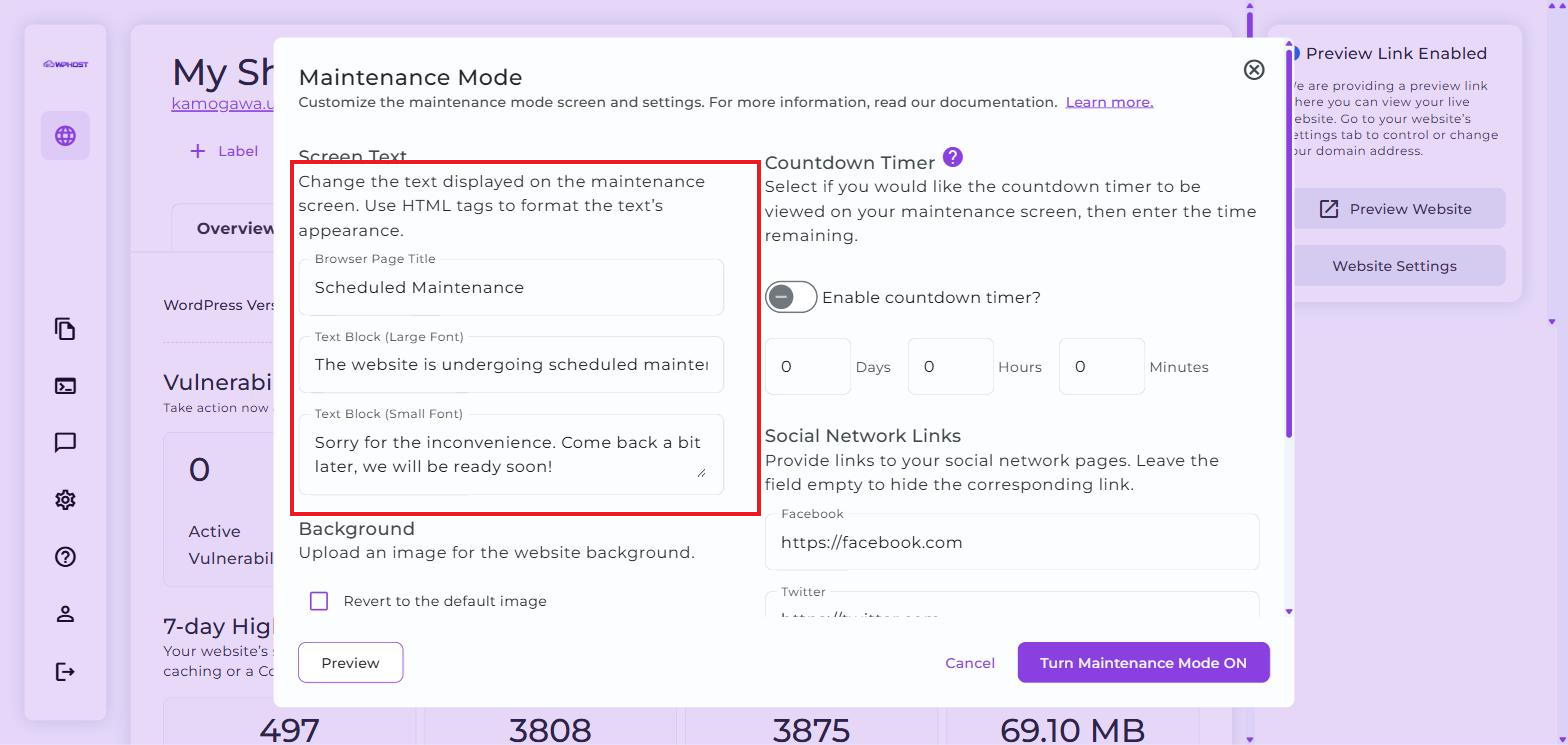
In the Screen Text block, change the browser page title and the large-font and small-font text blocks that visitors will see during maintenance.
You can use HTML tags to format the text.
Configure additional options and turn the mode on
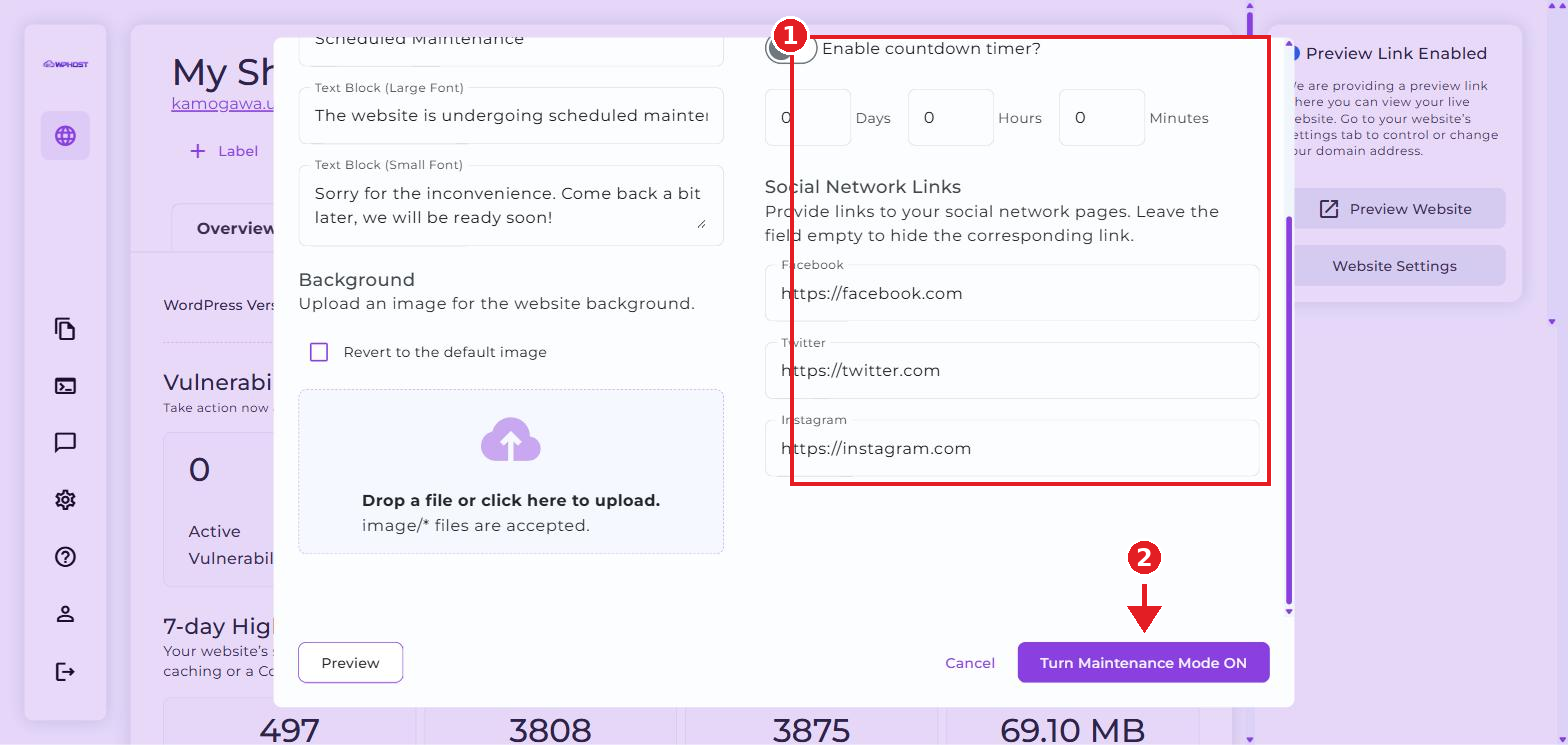
If needed, upload a background image, enable the countdown timer, and add links to your social media pages.
Click Preview to see how the screen will look to visitors, then click Turn Maintenance Mode ON.
Maintenance Mode is now on. Visitors will see the configured screen instead of your site’s normal content until you turn it off.
While Maintenance Mode is on, regular visitors won’t be able to view your site’s content. Remember to turn it off once the technical work is finished.