


How to Create a Staging Website in WPHost #
Staging creates a complete copy of your website on a separate temporary domain. Use it to safely test updates, a new theme, or a plugin, then push the changes you’ve verified to your live site with one click — or simply delete the staging copy when you’re done with it.
Open the website settings
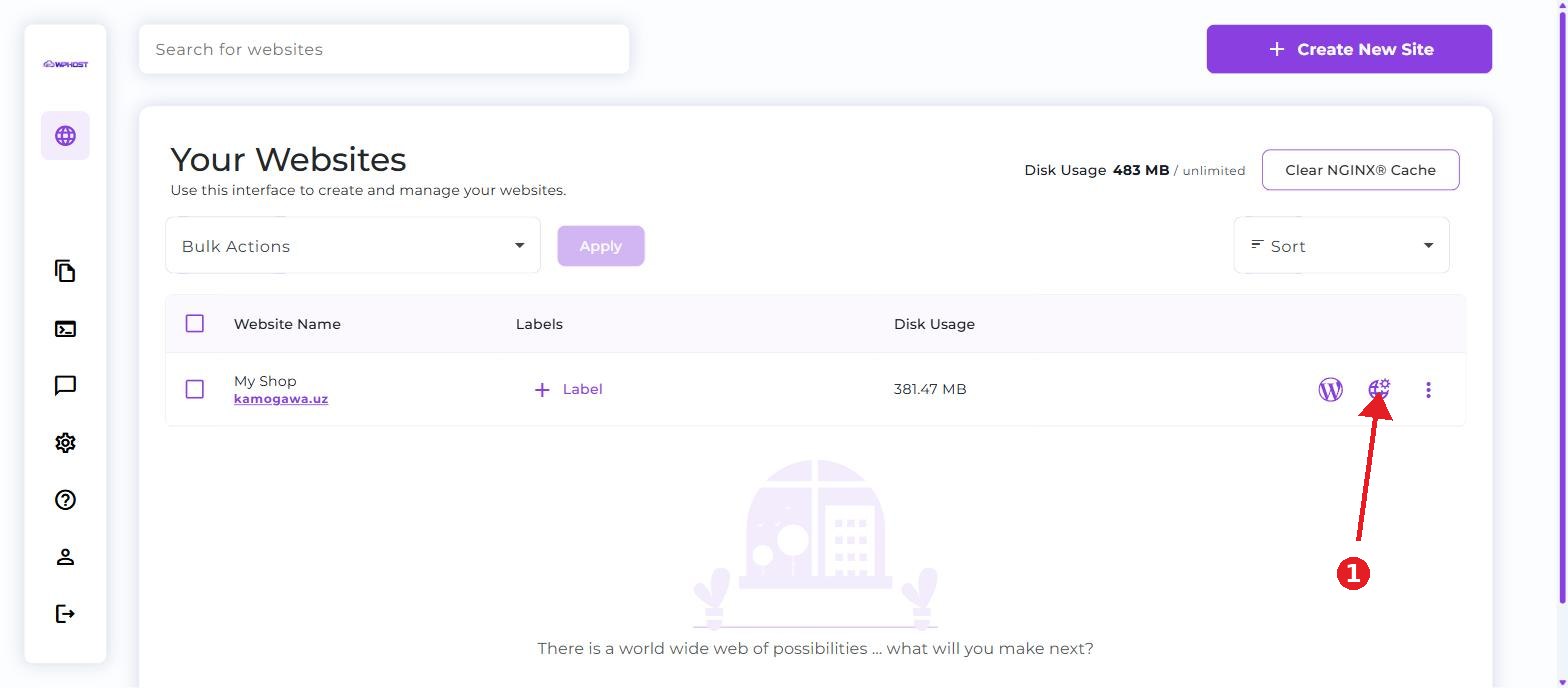
In the WPHost panel, go to the Your Websites section.
Find the site you need in the list and click the website settings icon on the right side of its row.
Open the “Create a Staging Website” tool
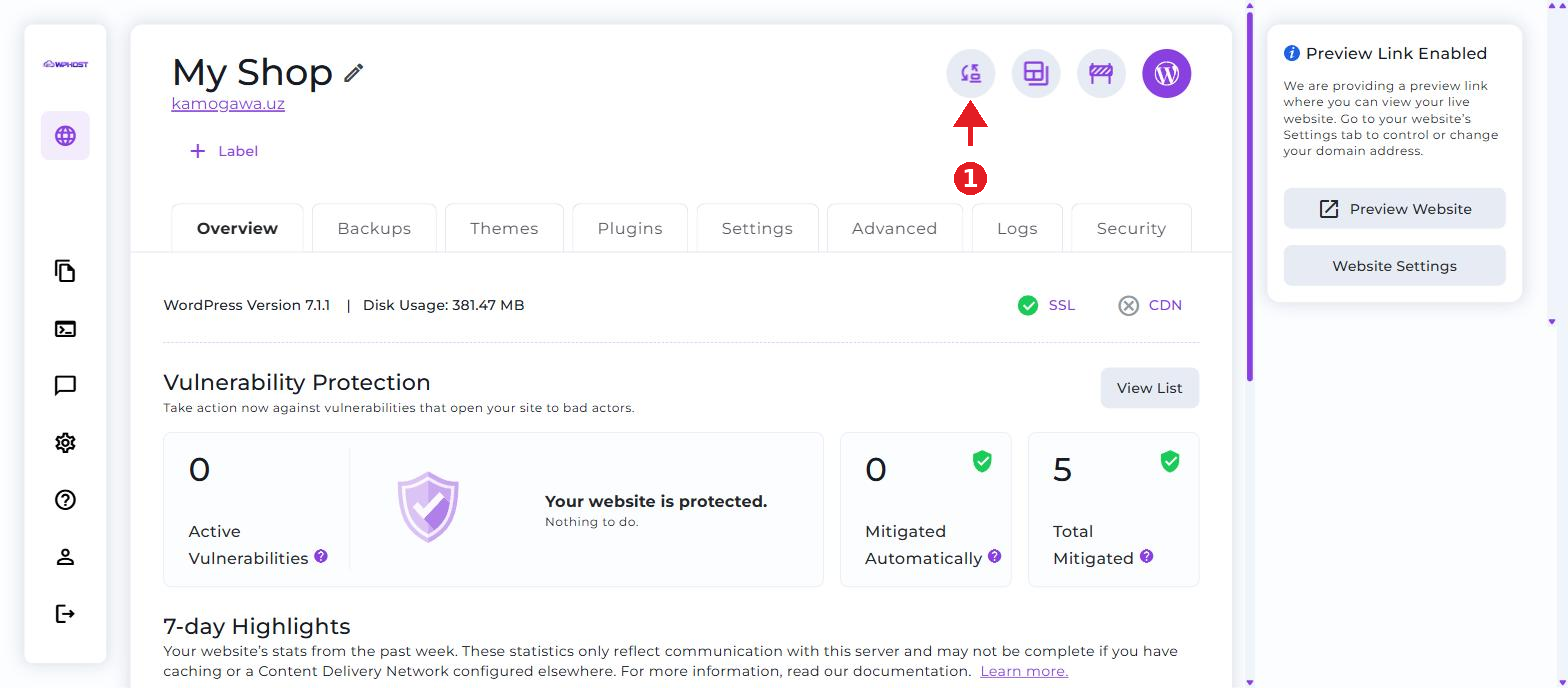
At the top right of the website page, click the first icon — Create a Staging Website (the icon with two arrows).
Choose who can view the staging site and continue
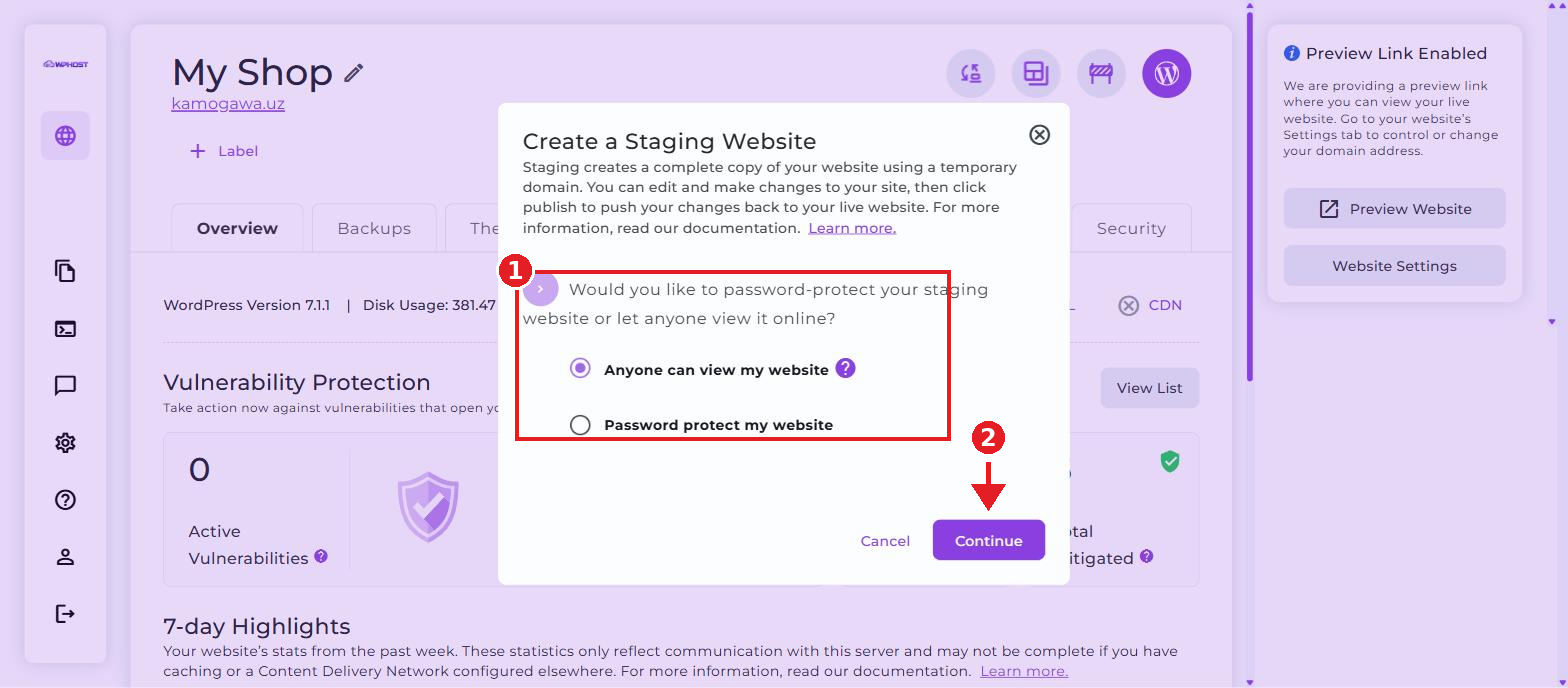
In the window that opens, choose who can view the staging site: Anyone can view my website or Password protect my website.
Click Continue.
Wait for the staging site to be created
WPHost creates a full copy of your site on a temporary subdomain — this runs in the background and can take a few minutes.
Once it’s ready, the staging site opens automatically and is marked with a Staging label. The top bar shows refresh and delete icons, plus a Publish button.
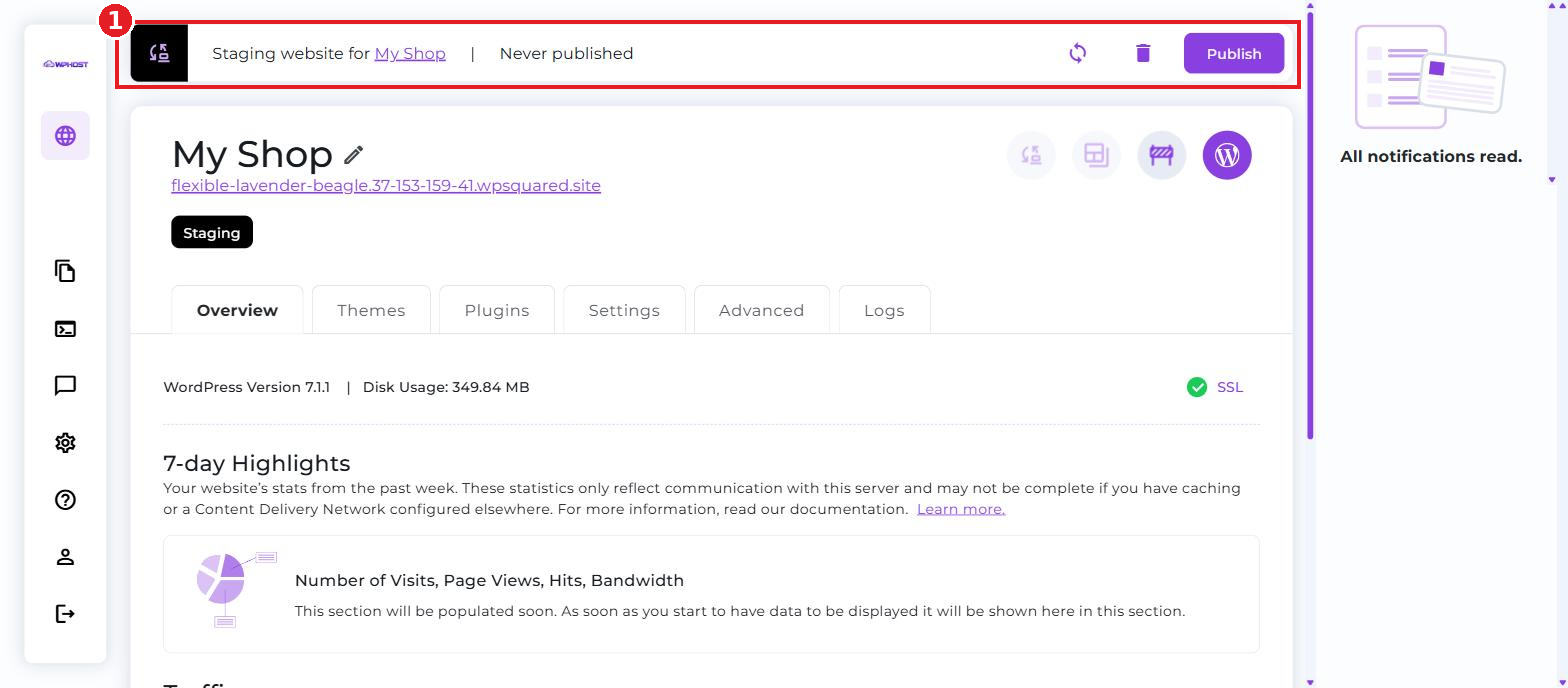
Your staging website is created and fully isolated from your live site — nothing you change there affects your main site until you publish it yourself.
A staging site uses disk space in your account just like a regular website. If you no longer need it, delete it with the trash icon in the top bar — you’ll need to confirm by checking I understand I am deleting everything, since deletion can’t be undone.